
My minimal makeup and beauty routine for van life
My beauty routine has totally changed since living in a van full-time. Today I'm showing you my minimal makeup routine. I'm dishing about what beauty products I've swapped out for more permanent makeup and beauty services, like brow lamination. (Cause your girl may live in an RV, but I still want to look and feel fresh and put together.)

If you’ve been following along for a little while you probably know that I quit my tech job last year. But what you might not know, is that the first several years of my career in tech were actually in fashion and beauty e-commerce. I’ve always loved style and aesthetics: from uber-frilly dresses my Abuelo (Spanish for Grandpa) made for me as a kid to eventually studying fashion at university. For the first half of my career I worked for brands you may know like ModCloth, Stylight, and tarte cosmetics.
Admittedly, in the last few years, my love for getting dressed up has suffered. Moving around so much has been a massive financial drain and has also limited my belongings—if I couldn’t carry it, then it was sold or left behind. Downsizing for full-time RV-living made me double down on that approach. And to my surprise in one aspect in particular: van life has totally impacted my beauty routine. Minimalistic wardrobes and personal hygiene (like showering) were often highlighted in Youtube van tours, but makeup was often omitted from the discussion. So that’s what I wanted to share today: how van life changed what makeup products and beauty services I use now, and the things I’m hoping to slowly swap out in time.
There are a few specific challenges to living in a van full-time that impact my beauty routine choices

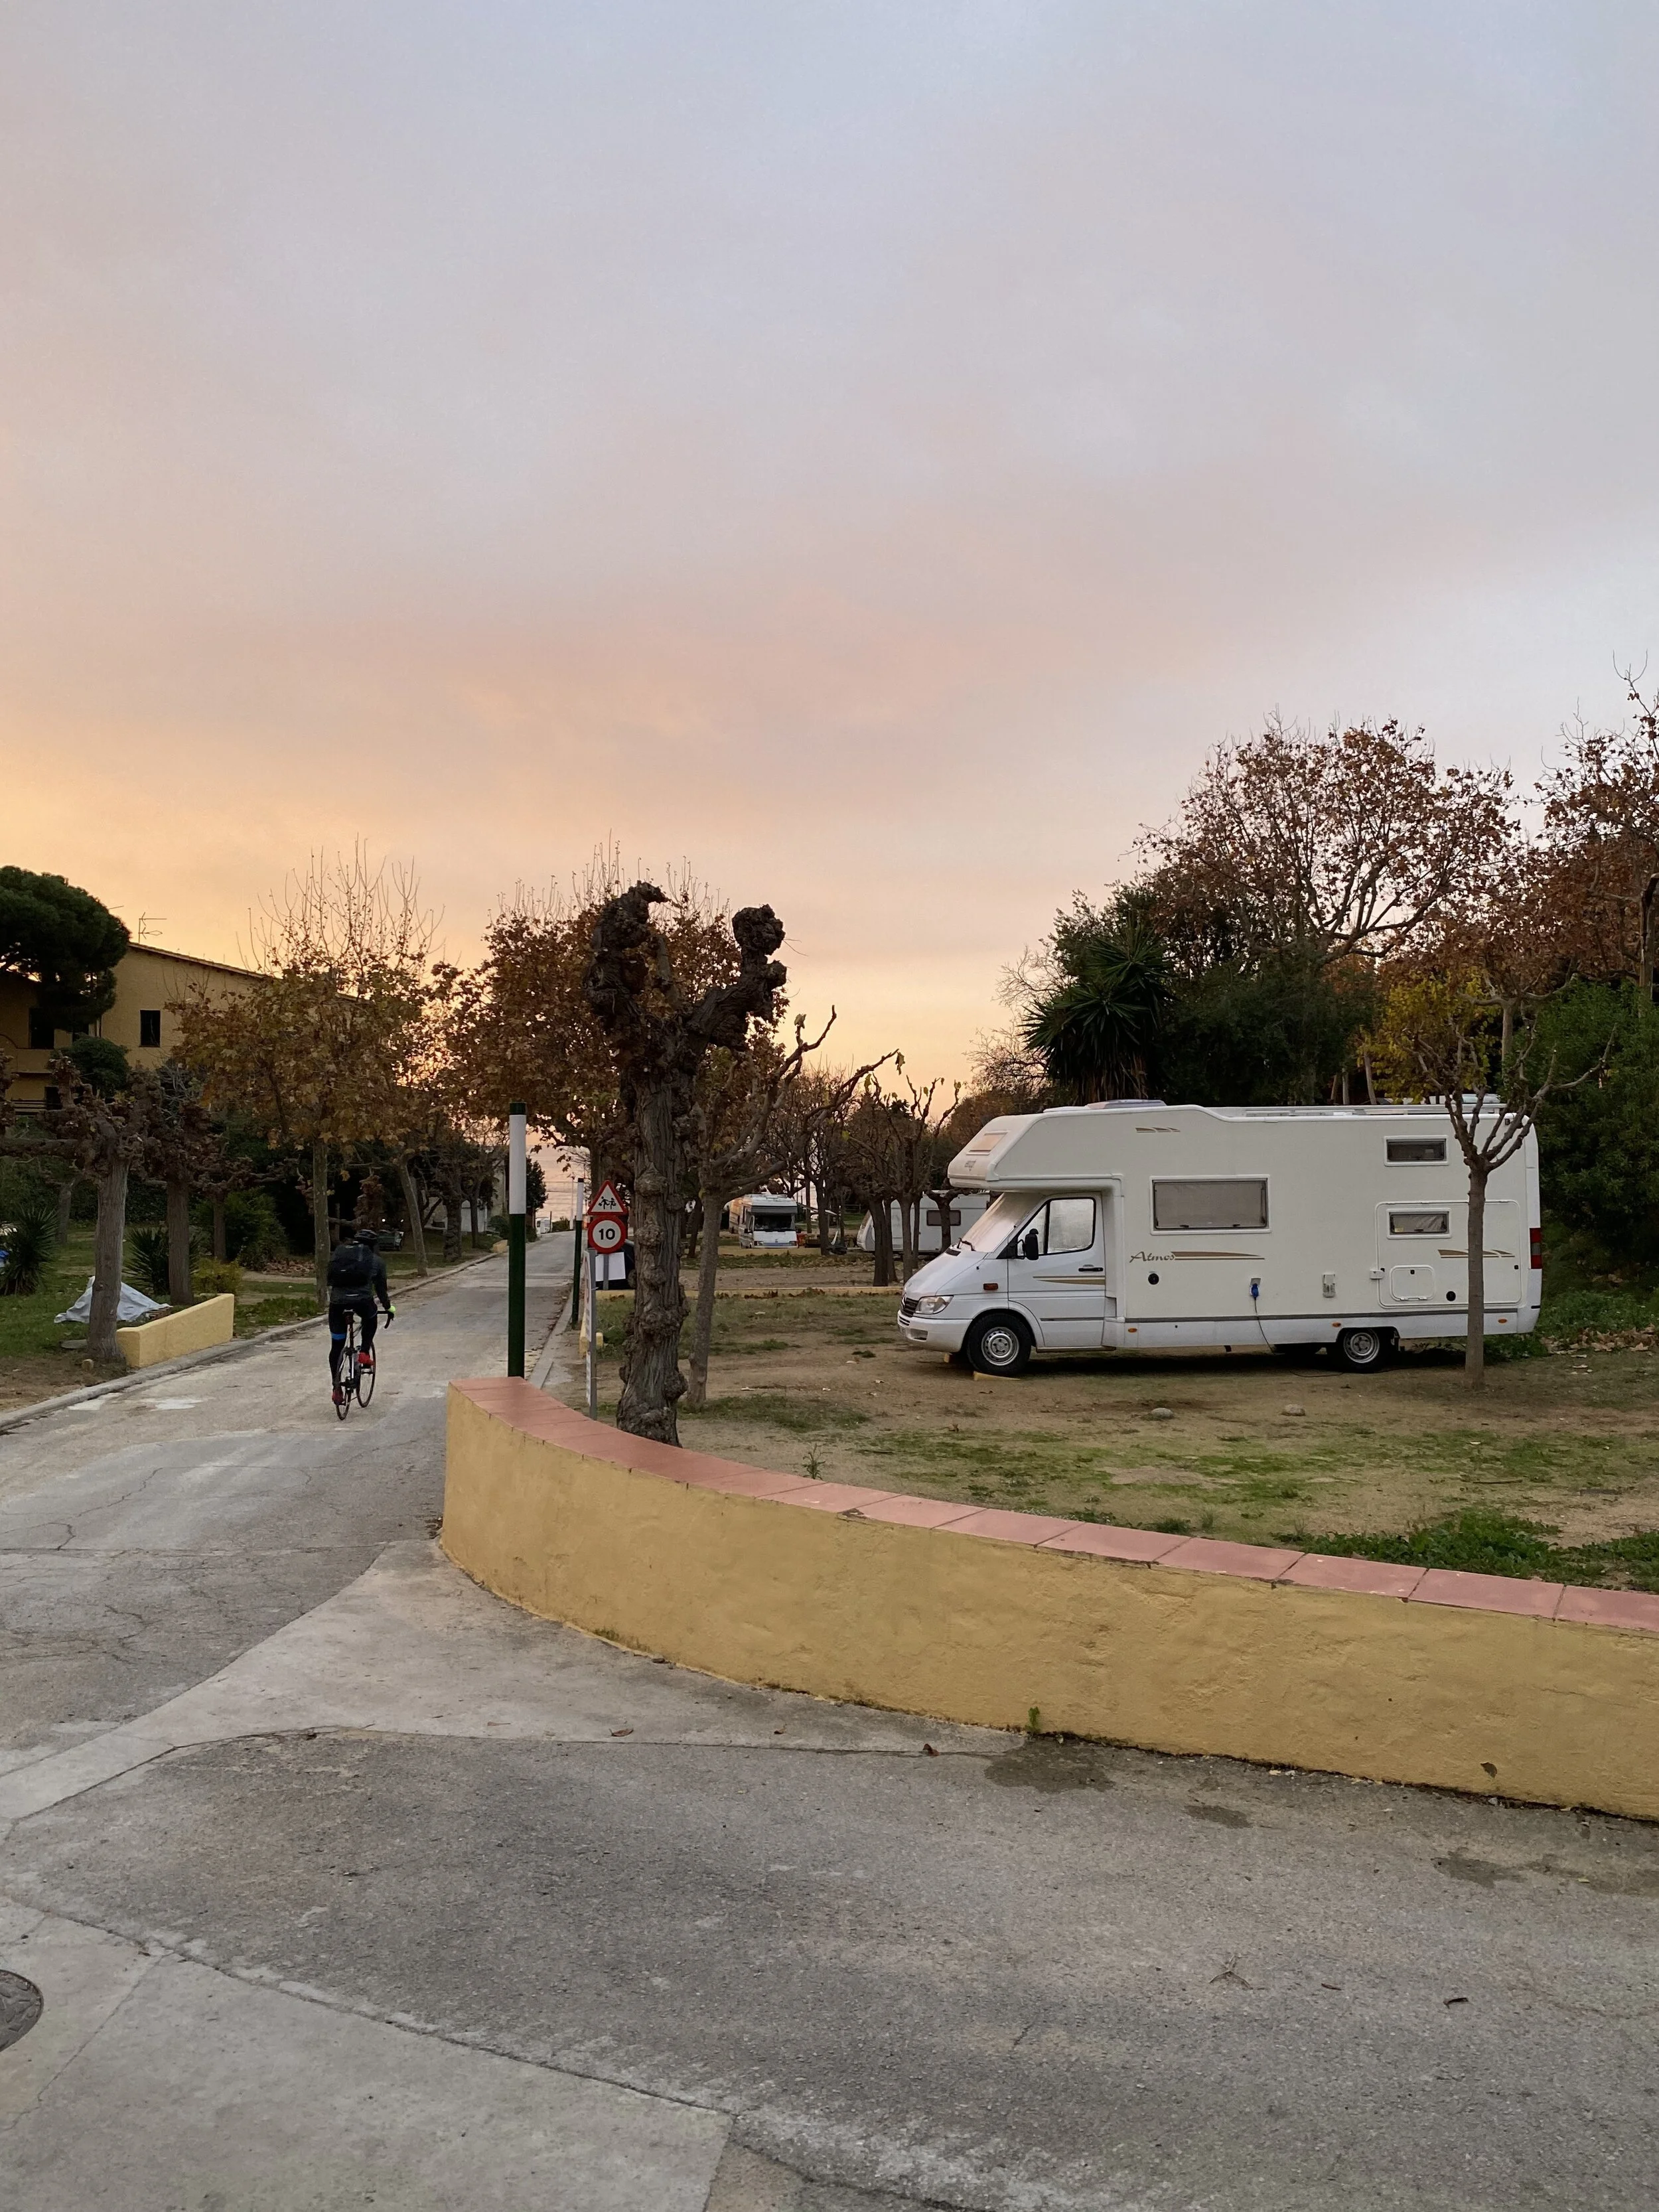
The most important of these is the reality of limited water. We have a 100-liter tank in our Mercedes Elnagh. Consider that this has to account for allllll our water usage: dishes, hand-washing, showering, quick clean-ups…everything! We usually get through our water supply in about 3 days. And that’s with refilling drinking water separately. This is such a big part of our daily routine now, that I can tell you roughly how much water a shower is in percentages. It takes about 12-20% of our tank for us both to shower depending on how indulgent we’re being.
Basically what this boils down to is that I wash my hair less frequently (which turns out is better for it anyway) and go really light on my makeup. Because of our limited water, it’d be unwise for me to wear layers of makeup—no matter how fun it can be to apply. I’d have to rely on makeup removal wipes to get it off, which isn’t good for my skin or the environment. Plus, we live a much more indoor-outdoor lifestyle now. Heavier foundations or makeup would gunk up quickly, causing breakouts. For all these reasons, and probably more I’m forgetting, I’ve changed my makeup routine. Now I focus on easy clean-up, protection from the elements, and a lower-impact on my health and the environment. That, and adopting some new beauty services.
That’s why I’ve swapped daily beauty products for semi-permanent makeup and beauty services

It’s become increasingly important for me to feel put together. In the midst of global chaos—politics, pandemics, and climate change—having some semblance of control feels necessary. And investing in myself, even in seemingly frivolous ways, boosts my baseline. I have had to rethink a lot of habits in my daily routine because of the van. For beauty specifically, I started exploring multi-use alternatives like hair and body bars, low waste and space-saving options, and beauty services that last. That’s when my friend from NYC mentioned brow and eyelash lamination. Lami-what? (Yea, that was my thought at first too.) Basically, they sculpt your brows and curl your lashes into a more flattering shape using a similar chemical to what they use on your hair for perms. I have super sensitive skin and didn’t experience any irritation. And the best part is that it lasts roughly 4-6 weeks. It just gives me a natural-looking boost: fuller brows and lashes without the daily irritation of product on my eyes or the time I’d usually have to invest filling them in.
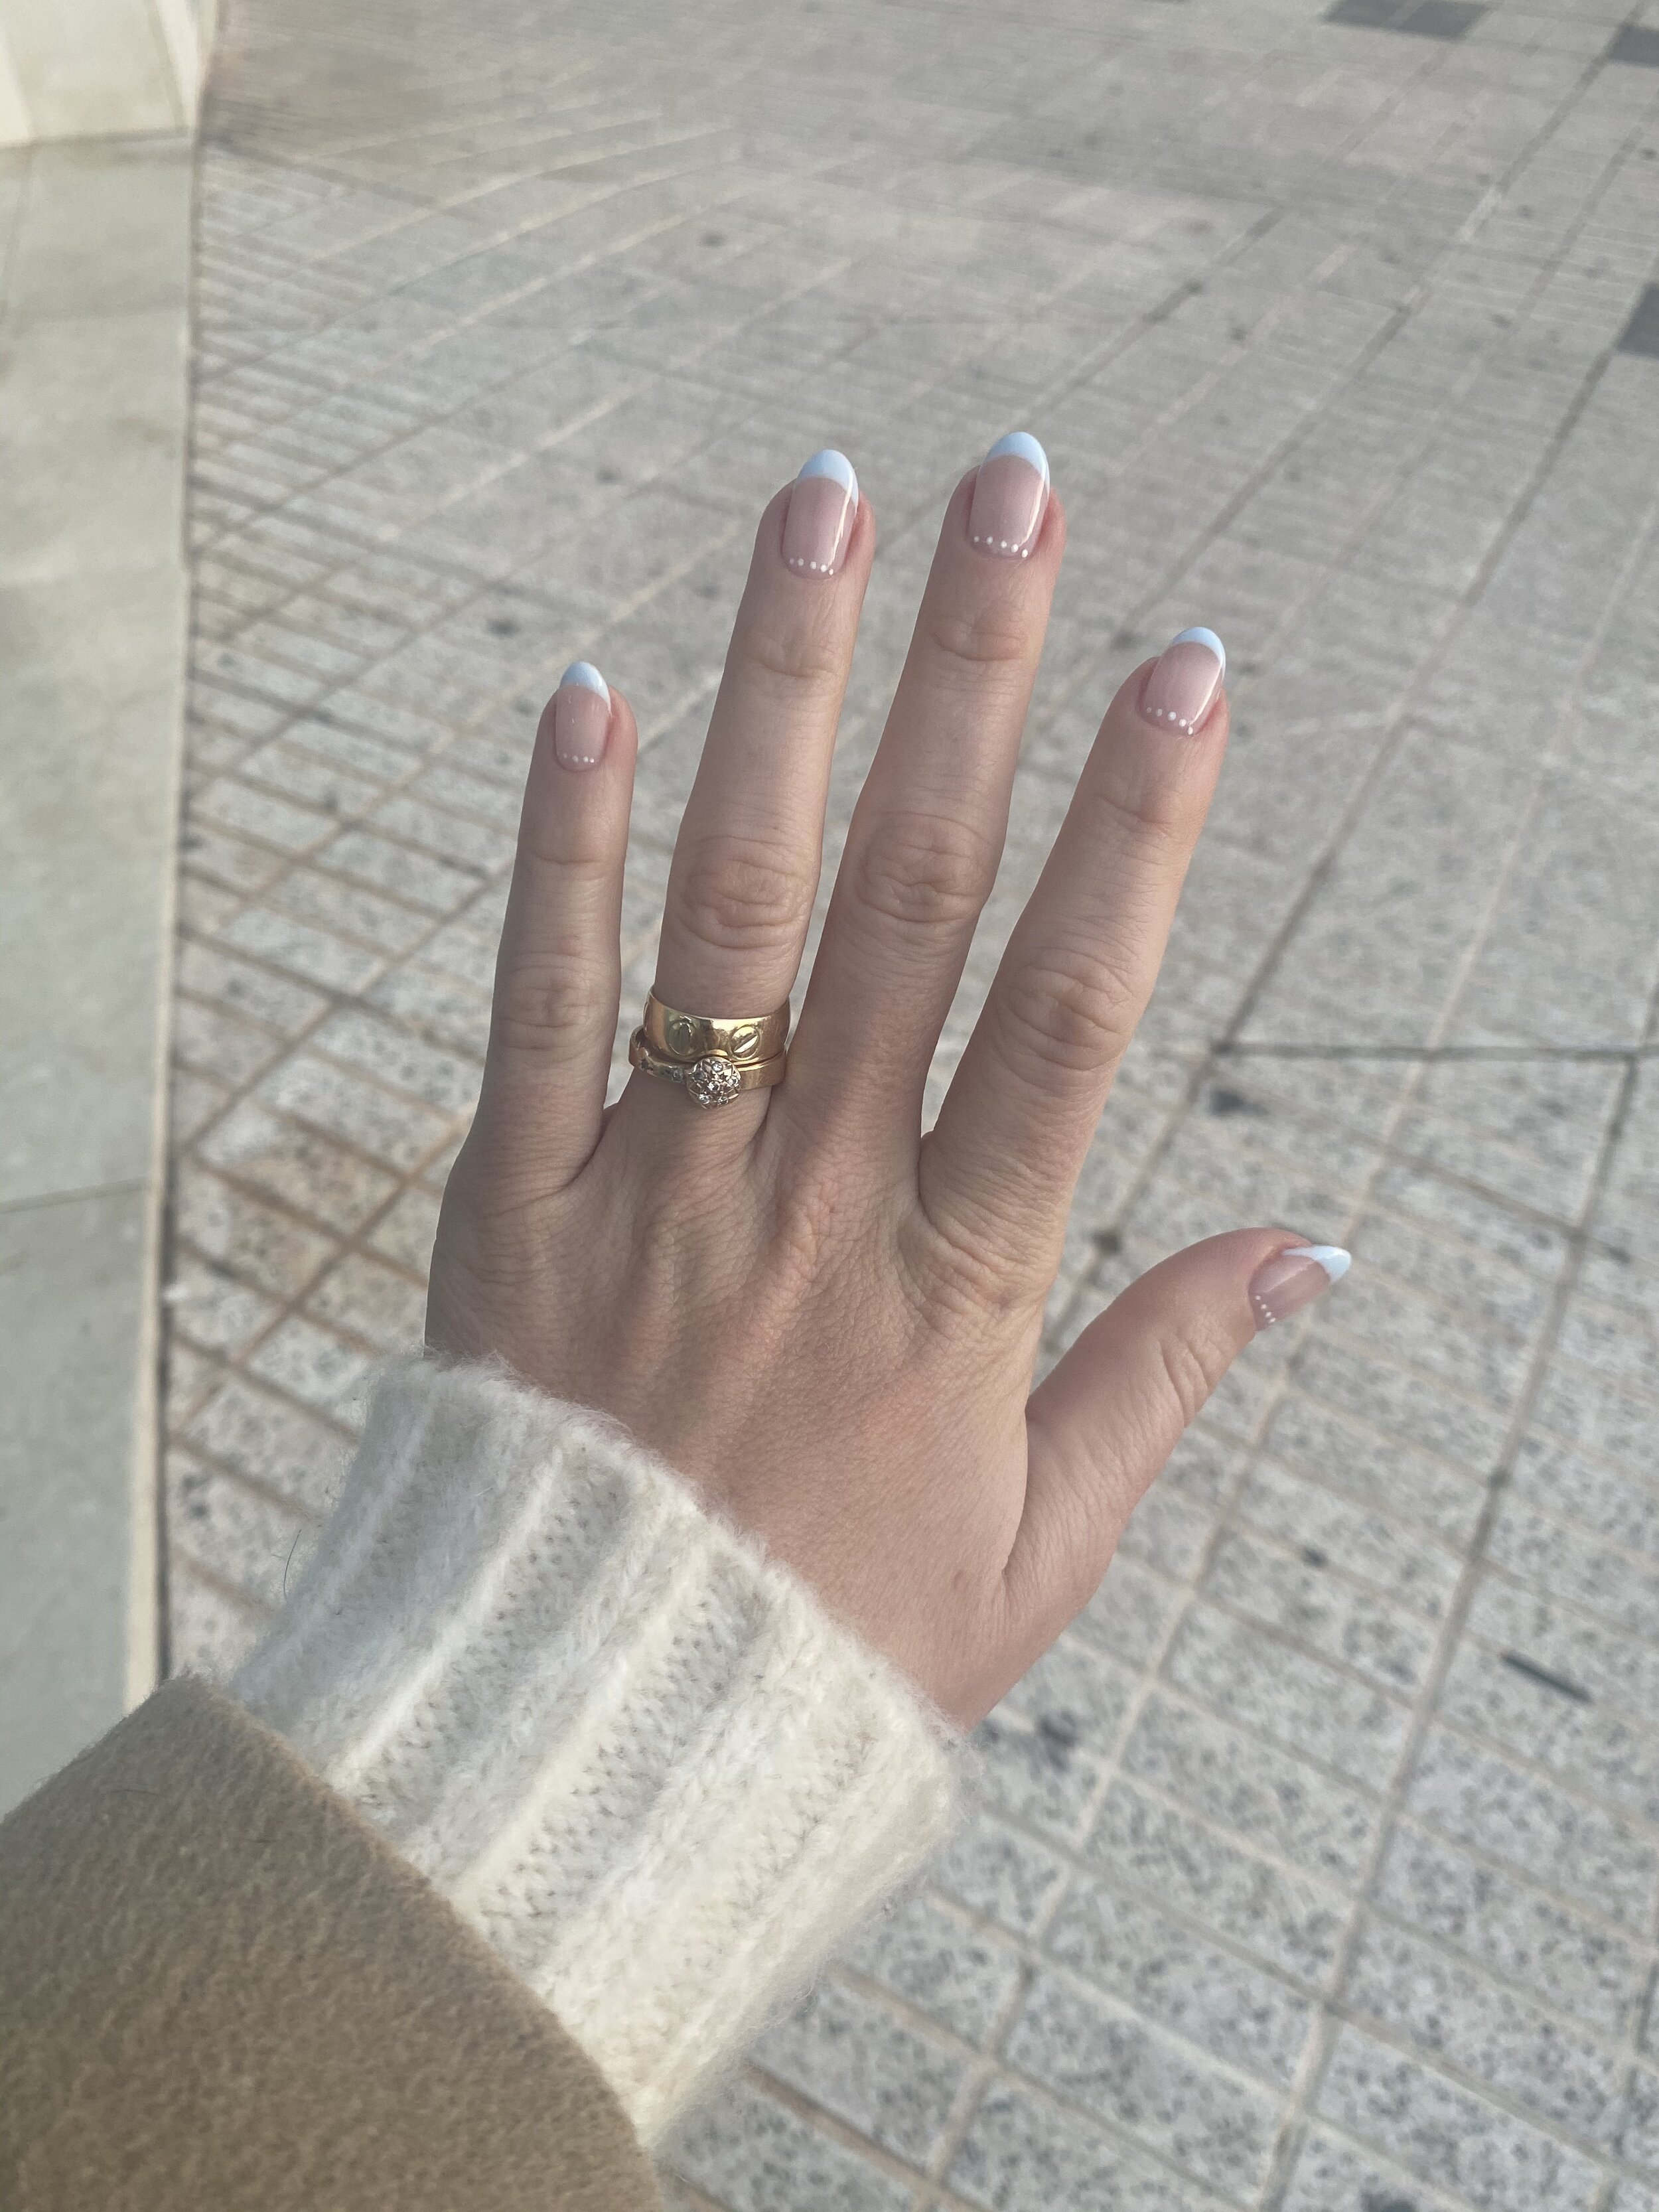
Oh, and I also opt for gel polish on my nails! I’ve done this one for so long now I nearly forgot. Girrrrrl, there is just something about a fresh manicure that makes me feel like I can conquer the world. (Who run the world?!) It genuinely makes me feel so happy. I’ve been known to show up to the salon with sketches of designs. It’s a little creative outlet that lets me try on new personas with way less commitment than, say, bangs. Pre-COVID it was also a great way to catch up with a girlfriend. Having my nails done makes me feel so feminine and so “Boss” at the same time—not that those things are mutually exclusive. I have relatively brittle nails, so doing a semipermanent gel helps me keep my natural length longer and allows me to do everyday tasks without the nagging concern of chipping a nail. Which let’s be honest, is super irritating after you’ve sat hands-tied for an hour. This way, I can get on with my day with one less thing on my mind. Are you seeing a pattern yet? (Can I get a “hell ya!” from my fellow Overthinkers?)


Now I can focus on lower-effort, minimal makeup in my daily life
Ultimately, this has been an awesome solution on so many levels. Though it’s an additional cost at roughly 50 bucks every 6 weeks, it saves me on other fronts: space, time, and water. It feels like a nice treat and a welcome interaction with another human—something we’re all starved for at the moment. The investment also extends the life of the few products I do use, probably paying off in the end. Most importantly, it allows me to focus my daily makeup routine on just 2 products!
Every morning, just with clean hands, I gently apply a tinted moisturizer with SPF from tarte. This gives me just enough coverage to smooth out my coloring, which can sometimes have redness from rosacea, and protect me from sun exposure since I’m outside a lot throughout the day. It also has the tiniest hint of shimmer that acts like a highlighter catching the Mediterranean sun. The only other daily makeup I use is Benefits tinted brow gel to touch up and maintain the lamination. Et voila! Done. It’s subtle but just enough to feel like the best version of me. It’s also really easy to clean off at the end of the day—mostly because I can skip mascara now. Every once in a while I gently rub some oil into my lashes to nourish them and extend the treatment.
My beauty routine will continue to evolve—just giving myself the permission to go slow and steady

Like most of the world, my salon trips have dwindled in the face of COVID, so my strands haven’t seen a colorist (or a stylist for that matter) in ages. At this point, “doing my hair” consists of finally getting around to washing it. This is my least favorite side-effect of van life on my beauty routine. I’ve read lots about how most shampoos strip your natural oils and leave your hair brittle, so I’m grateful for lockdown and van life being the excuse I needed to make the switch to less frequent washes and establishing my natural hair-balance. But damn, this process isn’t pleasant. When my hair is feeling particularly limp or uninspiring, I’ll opt for a few spritzes of dry shampoo to reanimate it. Though I haven’t found a brand I particularly love here in Europe. Eventually, I’d like to avoid the aerosol cans and find an effective, yummy-smelling option. (Let a girl know if you have suggestions!)
I’m also hoping to explore and revamp my skincare routine. Which at the moment is pretty non-existent. I like the idea of starting preventative practices like gua sha and cupping facials, but for now, I’ve prioritized other things. I’m hoping to find a brush for dry brushing soon and often use natural oils for self-massages or at-home massages. But I’ll share more on my self-care rituals someday soon.
All in all, moving into the van has been an interesting exercise in identity
In the grand scheme of things, living in the RV full-time is helping us to explore our values and build a life around them. For me, a part of that is understanding how my love for style and beauty (often consumer-y behaviors) can coexist in a gentler way. What are habits that I’ve inherited from a broken society (and prefer to shed) and what are passions of mine that I can adjust to be more ethical, sustainable, responsible, etc? Van life has given me a beautiful, and sometimes difficult, medium to explore what it means to be me and who I hope to be. Including the way I look and express myself in a physical and visual way.
How about you? Do you think you could survive on such a minimal routine? Do you have any product recommendations—I’d love the help! I’ve been on the hunt for small European brands I can support.

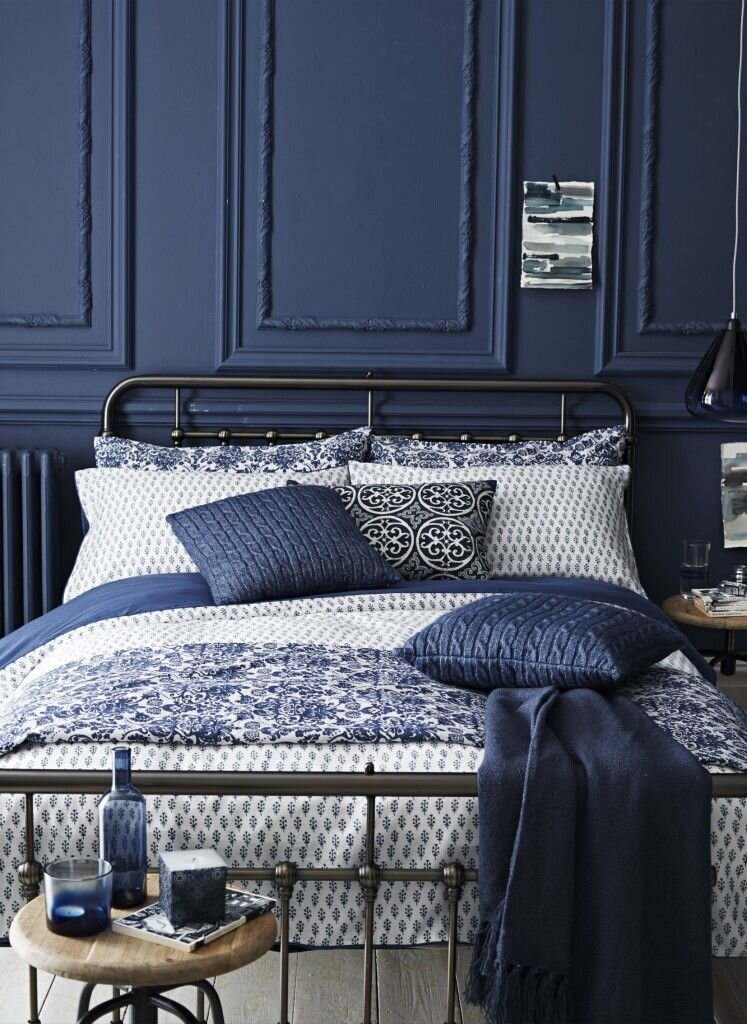
Small space inspiration: navy bedroom & a statement ceiling for our alcove bed
Introducing my new series on interior inspiration just for small space design lovers! For the first installment, I’m sharing our plans for a moody makeover of our RV bedroom. We'll be turning it into a fairytale alcove bed with navy walls and a statement ceiling. Dark bedrooms can be intimidating, so I wanted to walk you through the What and Why of renovating a bold bedroom.


cc left to right: my own | amara.com | Piccolomini Library floors by jehane on flikr | Scrovegni Chapel ceiling by Viaggio nel blu| scenicwallpaper.com | hm home
I’ve been wanting to experiment with a navy bedroom for nearly 5 years now. Why so long? Well, a move was always on the horizon—3 moves actually, including the big one abroad—so I painstakingly did the adult thing and waited. But it’s finally time to indulge that daydream. We’ll be making over our RV bedroom, which is really just an over cab bed, into a fairytale nook fit for a castle. (A Moorish-style castle that is…keep reading!) I know painting your bedroom a dark color can be quite intimidating for some, especially in small spaces. So I wanted to walk you through my decor inspiration and reasons for going bold.
Painting our small space a dark color is a functional decision

You can see the “BEFORE” of the alcove bed in our Youtube RV reno tour
True, I’m a total romantic and it shows in the way I design. But when advocating for tiny living, I always emphasize function above all else. So here’s the hidden logic behind going dark for our alcove bed: I’m a crap sleeper and I need all the help I can get. After doing some research, I’ve discovered the importance of minimizing light exposure to help you fall—and stay—asleep. I don’t just mean screens in your face before bed, but UV rays on your skin too. Painting our bedroom a dark color will help absorb light and create a space that feels safe to rest and encourages deep sleep.
In general, dark paint is such a versatile design tool. Inky walls can make an expansive space feel cozier and, when used in small space design, can help walls visually recede in a way that makes the room feel bigger. The latter is especially handy when two adults are sharing a teeny over cab bed and one of them is prone to claustrophobic panic attacks. (Yup, it’s me.) We’ll also be color-matching the bedspread and the curtain that divides the cab from the living space. Going monochromatic will help it feel like a dedicated room and reduce visual noise within the tight space.
Playing with pattern will also help make the space feel bigger
It’s not just going to be a solid navy color. You may think I’m nuts for suggesting a statement ceiling in a <4 foot crawl space, but stick with me here... Using depth of color, large shapes, or long lines can play tricks on the eye, helping to distort the perception of space and in our case help make it feel bigger. We can’t take ourselves too seriously—I mean we live in a van—so we’re going to lean into it. Adding pattern is so whimsical and layering patterns will add to the country home vibe we’ve gone for in our RV. The challenge is finding a motif that will add interest and depth without feeling oppressive.
The obvious place to start was to seek out wallpaper options but, given the low ceiling, the walls get banged up. You dirty minds! I mean from climbing in and out or making the bed. Wallpaper wouldn’t stand up to the wear and tear or exposure to the elements you get in an RV, so I couldn’t justify spending hundreds of dollars. I felt stuck for what to do next, so instead, we took a breather from renovating and hit the road over the holidays.
We’re looking to history and nature for specific inspiration
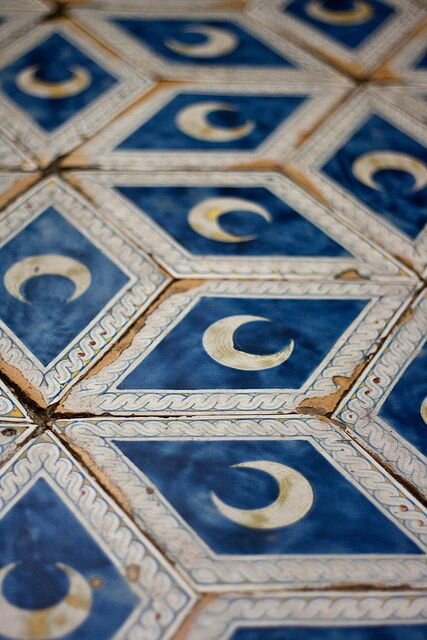
We weren’t sure what style to choose until we saw this Moorish-inspired palace. It snuck up on us while we were traveling! We’d stopped to see the Casa de Pilatos in Seville, a 15th-century palace built for the Dukes of Medinaceli. Parts of it were inspired by Arabic design and lavish in detail. But what I loved most was the indoor-outdoor feel—very relatable for van lifers like us. The inclusion of nature also helped make the overload of ornate decoration feel less pretentious. But there was one room in particular that stopped us in our tracks. We both looked up at this statement ceiling and then at each other, thinking, “that’s it!”

My photo of the Pilate’s Cabinet room in Casa de Pilatos in Seville, Spain
A navy ceiling with a variety of deep, medium, and light blue hues was dotted with shimmering-gold, star-like shapes. It’s historical relevance to the country we call home is meaningful to me and its likeness to the night sky feels hyper-relevant to the lifestyle we’ve just adopted. We loved the idea of reinterpreting the striking pattern for our own space. Simplifying the intricacy a bit will help it fit nicely with the other patterns we already have in the space and will add depth to the ceiling without it feeling “in your face”.
In the end, infusing our personal story is what makes our home singular and special
Fast forward to the post-holiday blues and I’m itching to get back into our RV renovation. I’ve started to pull together more examples of the style we’re hoping to capture in our so-called celestial ceiling. I’ve even seen some people refer to this look as “modern day mystic”. How cool? You choose whichever label you prefer, but I’m calling it my Velvet Sky.

cc @nomadbeautiful
You know that time of day—just after dusk—when the night sky turns a shade of navy that feels like if you reached out and touched it, it’d be made of velvet? That’s why I call it my Velvet Sky. It’s one of my favorite everyday, magical moments. Maybe because it’s usually when I’d be heading out to meet friends for a drink or strolling with my Love to dinner, but it’s an utterly romantic time of day for me. At least at this stage in my life. It reminds me so much of falling in love with Chris and I love the idea of capturing that essence, especially in our bedroom. It’s just kinda sexy too, no?
In the end, part of the fun of working with small spaces is how they force us to be super intentional and subsequently end up packed with thought and meaning. Like many folks, home wasn’t always a comfortable place growing up or as a young adult, so now that I’m homemaking for my own little family, I love to spend the extra time making it utterly ours.
So what do you think, would you be crazy enough to try this in your caravan or tiny home?
Update: check out the final over cab bed remodel on YouTube

How to find interior inspiration for your small space without being so literal
Often times when people are looking for decor inspiration they head to Pinterest, or leaf through magazines, looking for something that already exists, so they can replicate it. But being so literal in looking for interior design inspiration can be really limiting and, frankly, frustrating. I share my approach, or ‘secret sauce’, to designing a space that’s a perfect blend of my worldly style and need for function.

moodboard via homes to love au
Often times when people are looking for inspiration for decorating a room they head to Pinterest, or leaf through magazines, looking for something that already exists, so they can replicate it. But being so literal in looking for interior design inspiration can be really limiting and, frankly, frustrating. Why? Well, because every person or family will use a space differently. Our needs differ greatly depending on stage of life, available budget, the size of your home, personal style, and on and on. It’s part of what makes my work special and a rewarding challenge.
Because of this, I’ve come up with a sort of science to how I approach seeking interior inspiration and then applying that inspiration to a room. I’m going to walk you through my secret sauce today, so you can get unstuck in a current project or have more fun with your next room. (If at the end of this, you’d just rather I handle it, get in touch! I do in-person designing in Barcelona or digital consultations globally.)
Be clear about what you need from the space and identify any non-negotiables before you get carried away with the fun parts
Before designing a space, I like to come at the project from 2 angles: function and feel. Function defines how the space will be used and makes sure it “just works” without effort. Feel, is more about personal style and using aesthetics to capture a family’s essence and values in tangible form.

crop of Robert Lefèvre painting
Thinking through the function of your room, first and in detail, helps you identify the must-haves or prerequisites that are unique to you and your project. It’s important to emphasize that these are the things you can’t go back and solve easily if you realize them late. It doesn’t matter how pretty a room is if it adds to the friction in your life, instead of relieving it.
Identifying what the room needs to do—before what it could look like—gives you a list of concrete things you need to accommodate. Do you have a friend that will need wheelchair access, or out-of-town family that will visit a few times a year, or weight restrictions because your home is on wheels? Use this as the starting point for choosing the layout of the space, picking beautiful and functional furniture, and even weaving these unique attributes into the decorative details.
Once you have these in mind (and preferably written down), we can get down to finding inspiration for your ideal small space design. Here’s how I do it…
It’s not about finding a singular interior design style you like, it’s about identifying the details you’re attracted to—irrespective of its label
Let me give you an example: Say you want to redo your dining room. And you know you like the character of grand French chateau salons, but you’ve got a litter of young kids and pets, so your space has to accommodate them. Maybe you also kinda like the casual vibes of country cottages—but you could leave the doilies. So you try to find an example that already merges those 2 worlds: *types ‘classical french meets casual cottage dining room’ into Pinterest.*
That is awfully specific! Trust me, I’ve tried lol. And even if some examples already do exist, you’re limiting yourself by narrowing your avenues of inspiration. Instead, what I like to do is search all the various styles I’d like to encompass, in their original form. So in this example:
1) french chateau

chateau de la ballue via sharon santoni
2) family dining room

table via birchlane
3) and cozy cottage
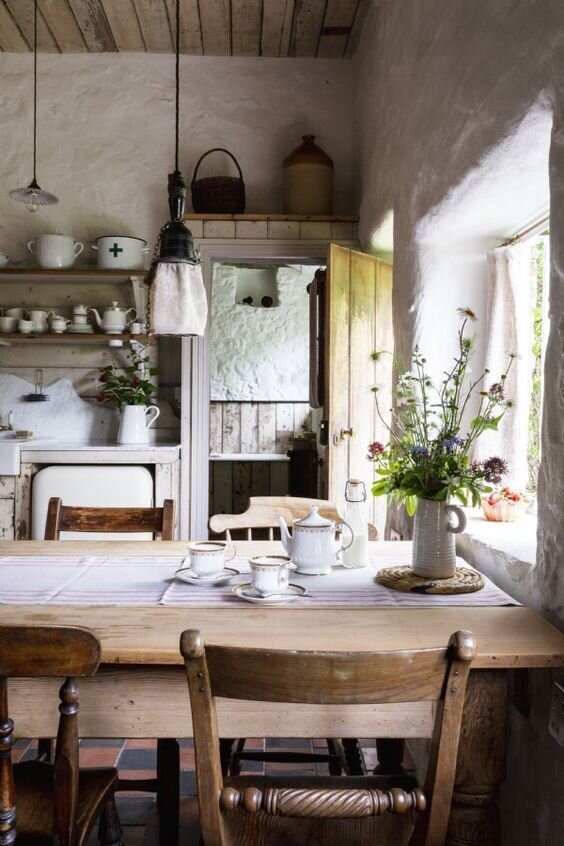
via from britain with love
Then sift through the results and see what patterns you find. Maybe it’s the molding that you most gravitate towards in French interiors, you prefer dining rooms with statement pedestal tables, and like the muted color palette of country houses. This way, you understand the details that draw you to each distinct design style. Perfect! That gives some clear direction.
Now, before you move on to hunting down the perfect pieces, do 1 more thing. Answer: is there anything that’s universal across those 3 inspirations? Try not to think in concrete terms. Open your mind up to more subtle queues. Is there a mood or ambiance that they all trigger in you? Maybe it’s low-light or candlelight, or the sense of gathering together…
Jackpot. In addition to identifying specific architectural details and furniture you can incorporate, you’ve also set a north star that can guide you through decisions when you inevitably need to pick details or overcome restrictions (like budget) that you hadn’t yet solved at the onset of the project.
Bonus tip: if you have a clear design direction, but you get stuck, look for inspiration in other creative arts

sherpa jacket via upwest

boucle Miller chair via @trit.house

barcelona colors that inspired our RV design

kitchen decor from our RV renovation
Okay, I’m giving up one of my top tricks here. One way I stay inspired consistently is that I try to ‘sponge up’ the world around me. It can all be fodder for inspiration. I don’t just seek interior design inspiration from interiors or architecture. For example, I love the relationship between fashion and interiors. Did you know there’s a long history of them influencing one another? Indulge me for a second: have you seen those super-wide 18th-century hoop skirts (held up by panniers), well they influenced furniture design out of necessity. I mean, how cool!?
People also often credit nature. Instead of thinking literally about its influence—like cold weather = cozy cottage or seaside city = boho loft—look to its color combinations and the way texture adds to the feeling of a place. Try reinventing what we already take for granted. For example, when reimagining our RV into a tiny home on wheels, we merged the ideas of a country cottage with oceanfront vistas with old-world heritage.
More examples of cross-pollination between fashion, art, and interior design:

Dutch floral painting from Golden Age
TheGoodiesWallpapers via etsy

Dutch fashion designer Peet Dullaert

Cecil Hayes via AD
Look, I know designing a space to be functional and feel good can seem like a daunting task. But like anything else, it’s just a matter of starting somewhere and learning along the way. If you allow yourself to be playful—and inevitably come up with some awful combinations—you’ll eventually start to have a 6th sense, another creative language all your own. By flexing those problem solving and creative muscles, you strengthen them. If after a few attempts, you’d like a trainer to help you get there faster, I’m happy to help guide you. Just email me.
I’d love to see what experiments you come up with. Post your creations on Instagram and tag me @elisa_llera.

RV remodel before & after: our #cottagecore inspired DIY RV kitchen
We picked up our motorhome the day Spain announced its second lockdown, so we dove headlong into our DIY RV renovation. First up, remodeling our RV kitchen. We wanted it to feel like home, so we went with a #cottagecore look! Lived in and well-loved. Minimal kitsch, but extra warm and cozy. That’s just what we got with this RV kitchen reno.
We picked up our 2001 Mercedes Elnagh motorhome the day Barcelona announced its second lockdown. Originally, we’d planned on living in the RV for a while before starting renovations. But after the orders to stay in place, we figured “hell, what else do we have to do?” and dove headlong into our DIY RV renovation. After some initial demolition, the first big project we tackled was our RV kitchen remodel. Because this wasn’t just a ‘weekending’ vehicle, it needed to be ultra-functional, but even more so, we wanted it to feel like Home.
We’d had nearly 2 years of discussion and daydreaming about full-time RV life before we actually had our hands on our van. This gave us ample time to gather inspiration for the interior design. Though we do plan to live around Barcelona long-term, we don’t consider ourselves Beach People, so a beachy bungalow or boho vibe wasn’t the right fit. We prefer to soak up the sun and the sea from high up on the oceanside cliffs. In other words, we’re Mountain Folk and predictably have a soft spot for cozy cottages. I’ve long loved ancient stone buildings and traditional old world interiors, and with Chris’ Scottish heritage, it just felt right for us to go with a country house feel. Lived in and well-loved. Minimal on the kitsch, but extra helpings of warm and cozy. And I think that’s exactly what we managed!
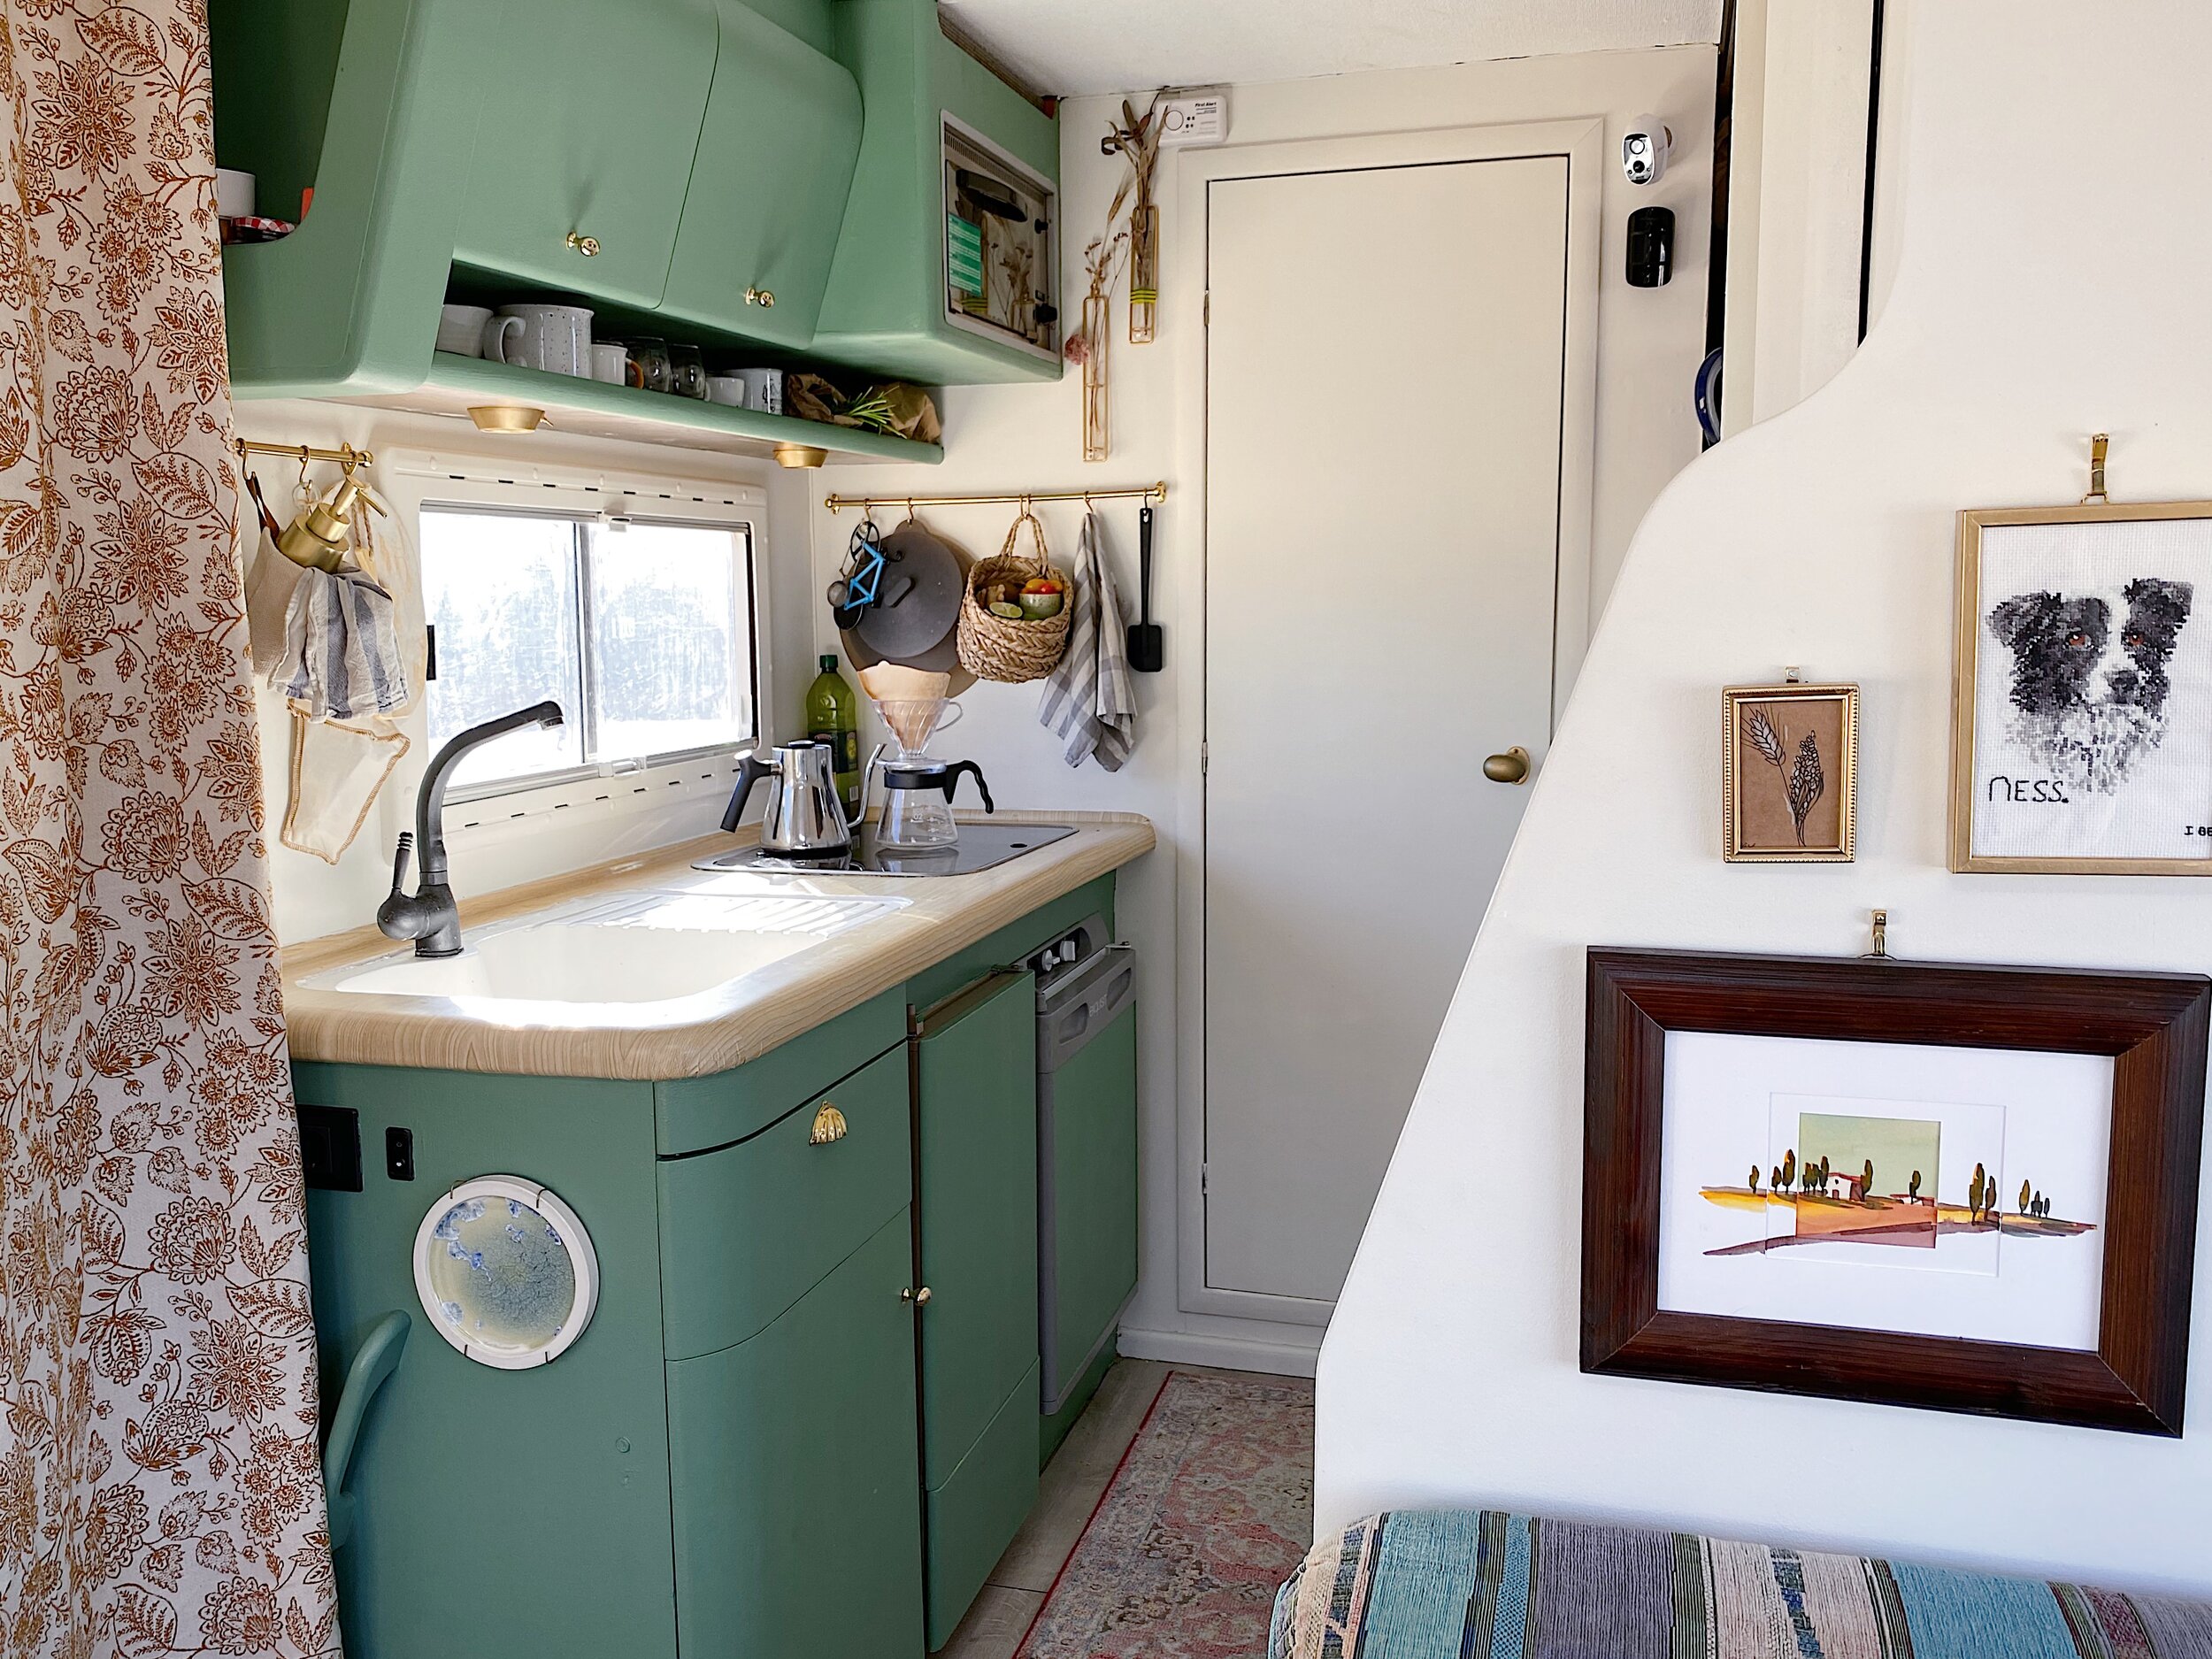
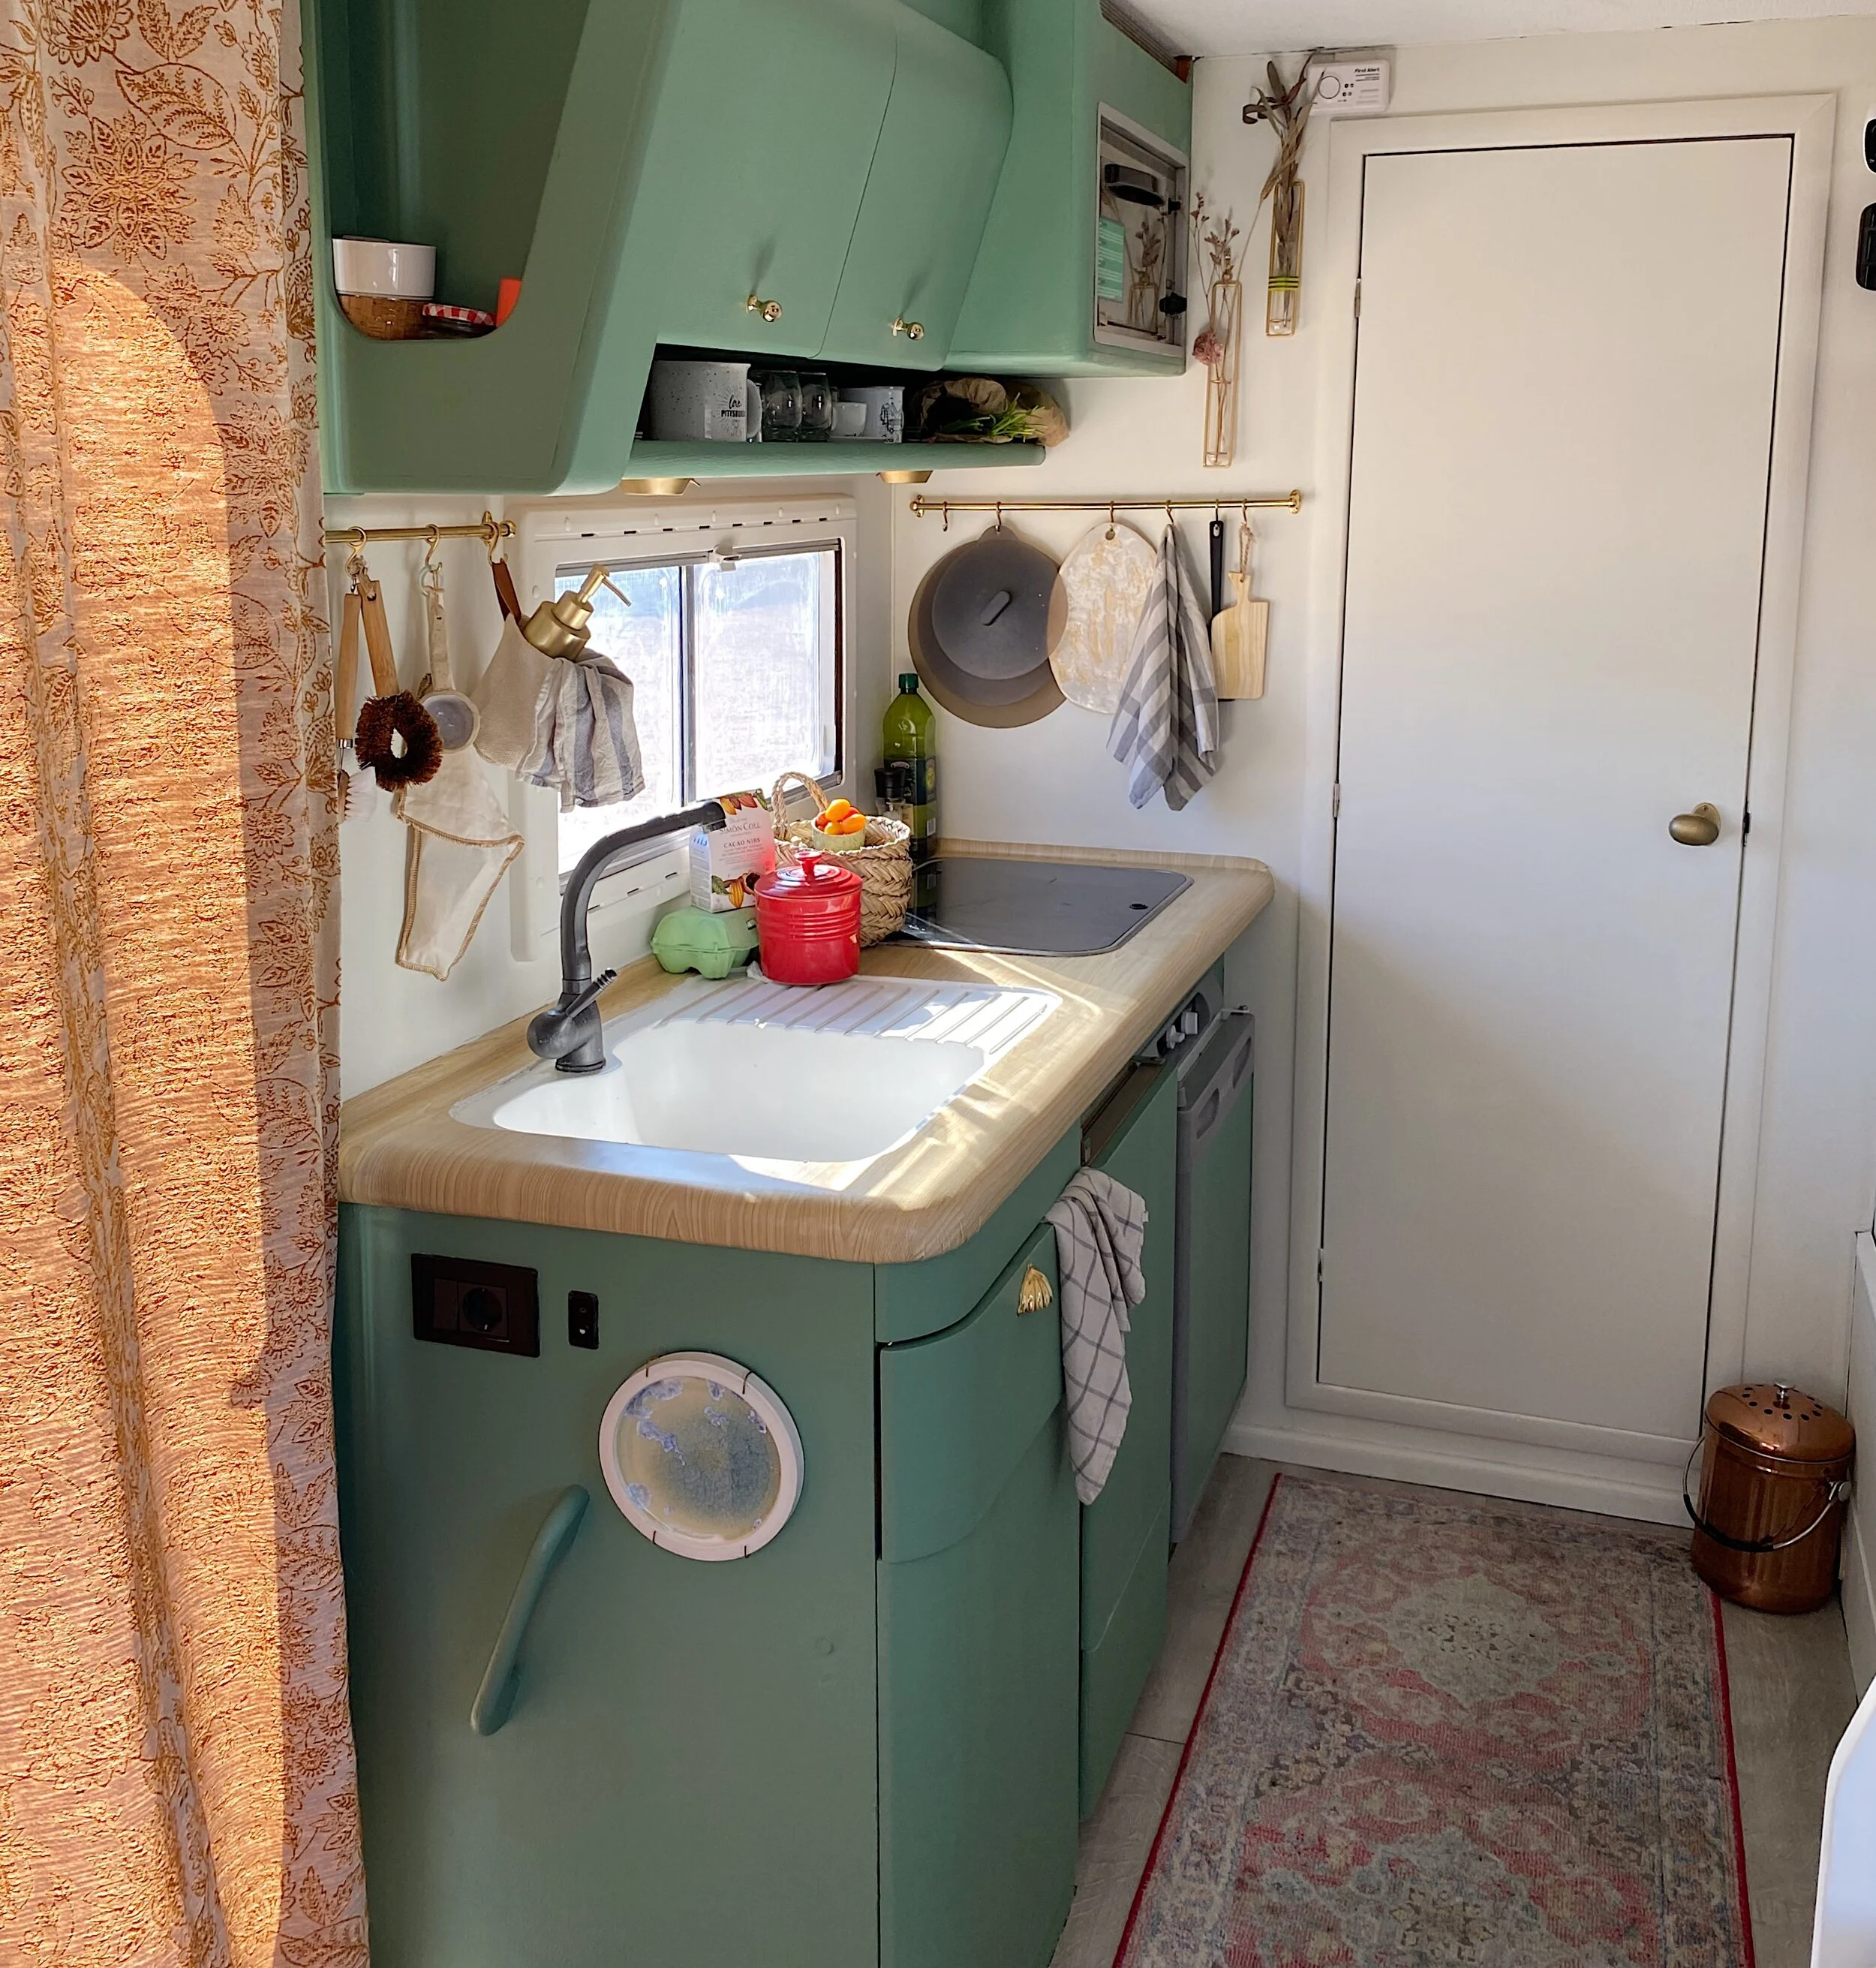
Here she is, the transformation of our RV kitchen then & now


The caravan was in pretty good condition when we bought it, despite her 19 years. In the hunt for the perfect tiny house on wheels, we narrowed it down to a few really important must-haves. They mostly centered around: engine condition, off-grid capabilities, internal layout, and budget. We knew we wanted a bit of a cosmetic project and Ida (our van’s name) ticked all the boxes, while still giving us the room to play with paint, textiles, and personality.
How we chose the paint color for our farmhouse-inspired RV kitchen

Dish by Caterina Roma and curtains from Maisons de Monde
Because it was a small space and would need to be road-ready within a few minutes, I couldn’t rely on knick-knacks and lots of decorative pieces to communicate the aesthetic we were going for. Instead, I needed to be really intentional about paint color, kitchen hardware, and the few functional kitchen accessories we’d have space for.
Early on, we agreed to avoid painting everything white and realized we both loved the idea of farmhouse-green cabinets. (Funny enough, they’ve blown up in popularity since.) I love the pastels of French country estates and the wheaty accents of paired-back, modern farmhouses. And Chris is partial to color with a little more saturation. Those were our guidelines for picking the right shade of green for our kitchen cabinets. Looking back, it’s ironic that despite choosing not to go with beachy vibes, our color scheme nods to the ocean hues of our seaside city anyway—something we both love in retrospect.
Another key element to achieving the #cottagecore kitchen of our dreams was to add new kitchen hardware to the RV cabinets. The original push to close latches were a dated chrome finish and lacked character. So I swapped them for more traditional brass handles that could patina with use to give us that well-loved farmhouse look. To my surprise, what was meant to be a quick fix turned out to be one of the most time-consuming projects. If you want to replace your RV cabinet handles check out my easy tutorial to save yourself some time. In the end, they added the charm I was hoping for, especially paired with new brass hanging bars.
Why we installed hanging bars for the perfect storage solution in our RV kitchen
Storage is key to full-time RV living, so it was something we were keen to add more of during the renovation. Some people choose to park up in a single locale for a few weeks or months at a time, but we knew (after COVID) we would be traveling frequently for fun and to scout out a plot of land for our one-day bricks and sticks tiny home. With that in mind, we’d need to get as much of our day-to-day stuff secured or put away, so we wouldn’t be wasting tons of time shuffling things around every time we wanted to hit the road.
Adding kitchen bars was the right solution for us. It served multiple purposes like, keepings items organized while being easily accessible at all times, securing things in place but still allowing them to gently swing without breaking during transit, and it also gave me the opportunity to display accessories that were beautiful and meaningful, but not too stuffy—like items you’d find in a family cottage or farmhouse.

Items from Ja Ceramics, Coffee Sock, Ikea and Muy Mucho
It was so fun to hunt down just the right pieces. We tried to repurpose a lot of kitchenwares from our previous flat, many of which were gifts. We chose to commission a couple of important pieces (pictured left), so in the end, we only had to buy a couple of new things. Now, our very personal display consists of:
custom-made ceramic coffee scoops and a charcuterie board
sustainably-sourced cotton coffee socks
varying sizes of wooden cutting boards
blue and cream french-inspired tea linens
little bits of leather, twine, and brass throughout
and a place to display dried flowers from bouquets Chris has bought me on special occasions
I’ve adopted the Slow Home ideology with this home, so I’m sure this collection will change and evolve with our travels and as our family needs change. And I love how that’ll help mark our chapters.
We also upgraded our countertops with contact paper for a budget-friendly RV kitchen remodel


Of course, renovating the RV while we were living in the ~160sqft (14m2) space had its fair share of challenges: constant mess and dust, sharp tools and tripping hazards, lack of running water, and sometimes noxious fumes. Because of this, it required that we split our renovation goals into 2 phases: The Right Now and The Ideal. Though it’d be beautiful to add a butcher block countertop—in an ideal scenario—we’d have to investigate it more thoroughly because of installation and weight. It wouldn’t have been realistic to rip out the countertop, reinstall the water system, and replace the gas stovetop without the proper power tools or a safe place to escape to at night.
So instead, we went with a budget-friendly fix of paint and contact paper for upgrading the RV kitchen countertop right now. Even then, it did require we go without running water for over 2 weeks so we could repaint the sink (and bathroom shower)! We relied on the campground for bathroom breaks, showers, and cleaning dishes. Once it was thoroughly dried, I applied the contact paper and sealed the edges with silicone for protection. It was my first time doing it, so it didn’t turn out perfectly, but it looks a hell of a lot better. It’s livable and definitely much prettier now too.
Final touches, we used rugs and curtains for that lived-in coziness in our DIY RV makeover
Part of what attracts me to cottages and farmhouses are their heritage charm. I love that almost tangible feeling of familial love and collected memories in old homes. And though our lifestyle is a rather creative solution to challenges facing a modern world, I wanted our home to have that same essence. After all, just because we can change our exterior surroundings with relative ease, these 4 walls are still where we live out our lives together—laughing, crying, growing together.
I hope you’ve enjoyed this peek inside our little home. And that it helps you to get creative and rethink the space you’re already in, or just maybe, it’s inspired you to dream up a whole new reality for yourself. Whatever is right for you in this season of your life. Just like this is right for us, in ours.

How to replace your RV kitchen handles in a DIY RV renovation

Replacing kitchen hardware, like changing a cabinet handle, is one of the easiest things you can do to update a kitchen. That is, in a normal house. But RV renovation isn't normal DIY home reno and replacing the push to close latches in our RV proved more of a challenge than I would've expected. Which is part of what made it fun! And admittedly, a total pain in the ass sometimes.
After 2 years of planning, I quit my full-time job and my partner and I moved into our RV for full-time van life. Because this wasn't just a weekending vehicle, we invested in getting her extra homey and functional.
One of the biggest projects we took on in the first month was a budget renovation of the RV kitchen. I wanted it to feel like you'd wandered into a country cottage kitchen—plenty of warmth, femininity, and natural details. It also needed to be packed full of storage solutions that would be safe while in transit. If you're curious, I shared my inspiration and design plans in another post.
A key element to achieving the look was to change the push to close latches on the RV cabinets. They were a dated chrome finish and lacked character. Instead, I installed more traditional brass handles that could patina with love and use—and give a hint of that well-loved cottage aesthetic. (We also added interior cupboard closures for security later.)
I found just the right cabinet pulls for our RV at Bolibar hardware store in Barcelona. Their selection is impressive! Spanning tons of rooms, metal types, and aesthetic styles from modern to old world-inspired (my preference, of course). The staff was both friendly and helpful, despite my broken Spanish.
It wasn't until I was home, tools out, and ready to dig in, that I really realized just how much labor (and creativity) it was going to take to get these new door handles up and running. I thought I'd share the process I followed for upgrading our RV kitchen cabinets, so you can save some time and hassle in your own DIY van build.
Why is it harder than upgrading normal handles?
If you don't have your hands on your van yet, you might not realize that the door handles used in mobile homes differ from everyday hardware. I mean, your run of the mill dresser isn't barreling down the highway at 70 mph.
Most vans and RVs will have some sort of latch and pneumatic closer combo that secures the door while in transit. Highly important, so that the few prized possessions you still own don't come flying out while you drive and try impaling your dog...or so I've heard. 😬🙈
There's a variety of specific options, but the setup will look something like this:
Our RV had the push to close latches. Aptly named, you simply push the knobbly bit in to lock the door into place. Because they're an all-in-one fixture they leave big ol' holes in the door when you remove them.
I was committed to a specific vision for the kitchen in my head, so I had to find a solution for filling the holes in all 10 doors and ensure they'd hold up to the everyday force of opening and closing the doors. So with the challenges clear, here's what I used to tackle the project.

Supplies I used to complete the project:
10 cabinet handles + 10 screws
10 pull force cabinet latches + 40 screws
1 dowel rod
Saw
Hammer
Flathead screwdriver
Drill (to pre-drill hole and fasten screw)
Spackle
Sand paper (fine grit between 100-120)
Step 1: Removed the old closures
Kinda hard to tell here, but the screws were poor quality and pretty chewed up. So it was tougher than anticipated to get them out. After some research, I found a way to get the drill to catch the screw heads and was able to remove all 10 cabinet handles.
Once unscrewed, removing the main mechanism was pretty easy, but there was also a grommet (or metal ring) that proved a little more stubborn. I used a flat head screwdriver to gently hammer them out of the wood.
Step 2: Cut and sand dowel rod fillers
I'd started the project before having a plan for filling the gaping holes in the cupboards. And one night as I was falling asleep, the solution came to me! (I know, I know, this is the stuff of my dreams. 🤷♀️)
I bought a dowel rod that was at least 10x the depth of one of the holes and then hand-sawed it into 10 individual fillers. Each one the approximate depth of the door. Cutting each of these by hand was time-consuming. If we had one, a circular saw would've been a better option. You can also ask your hardware store if they offer the service.

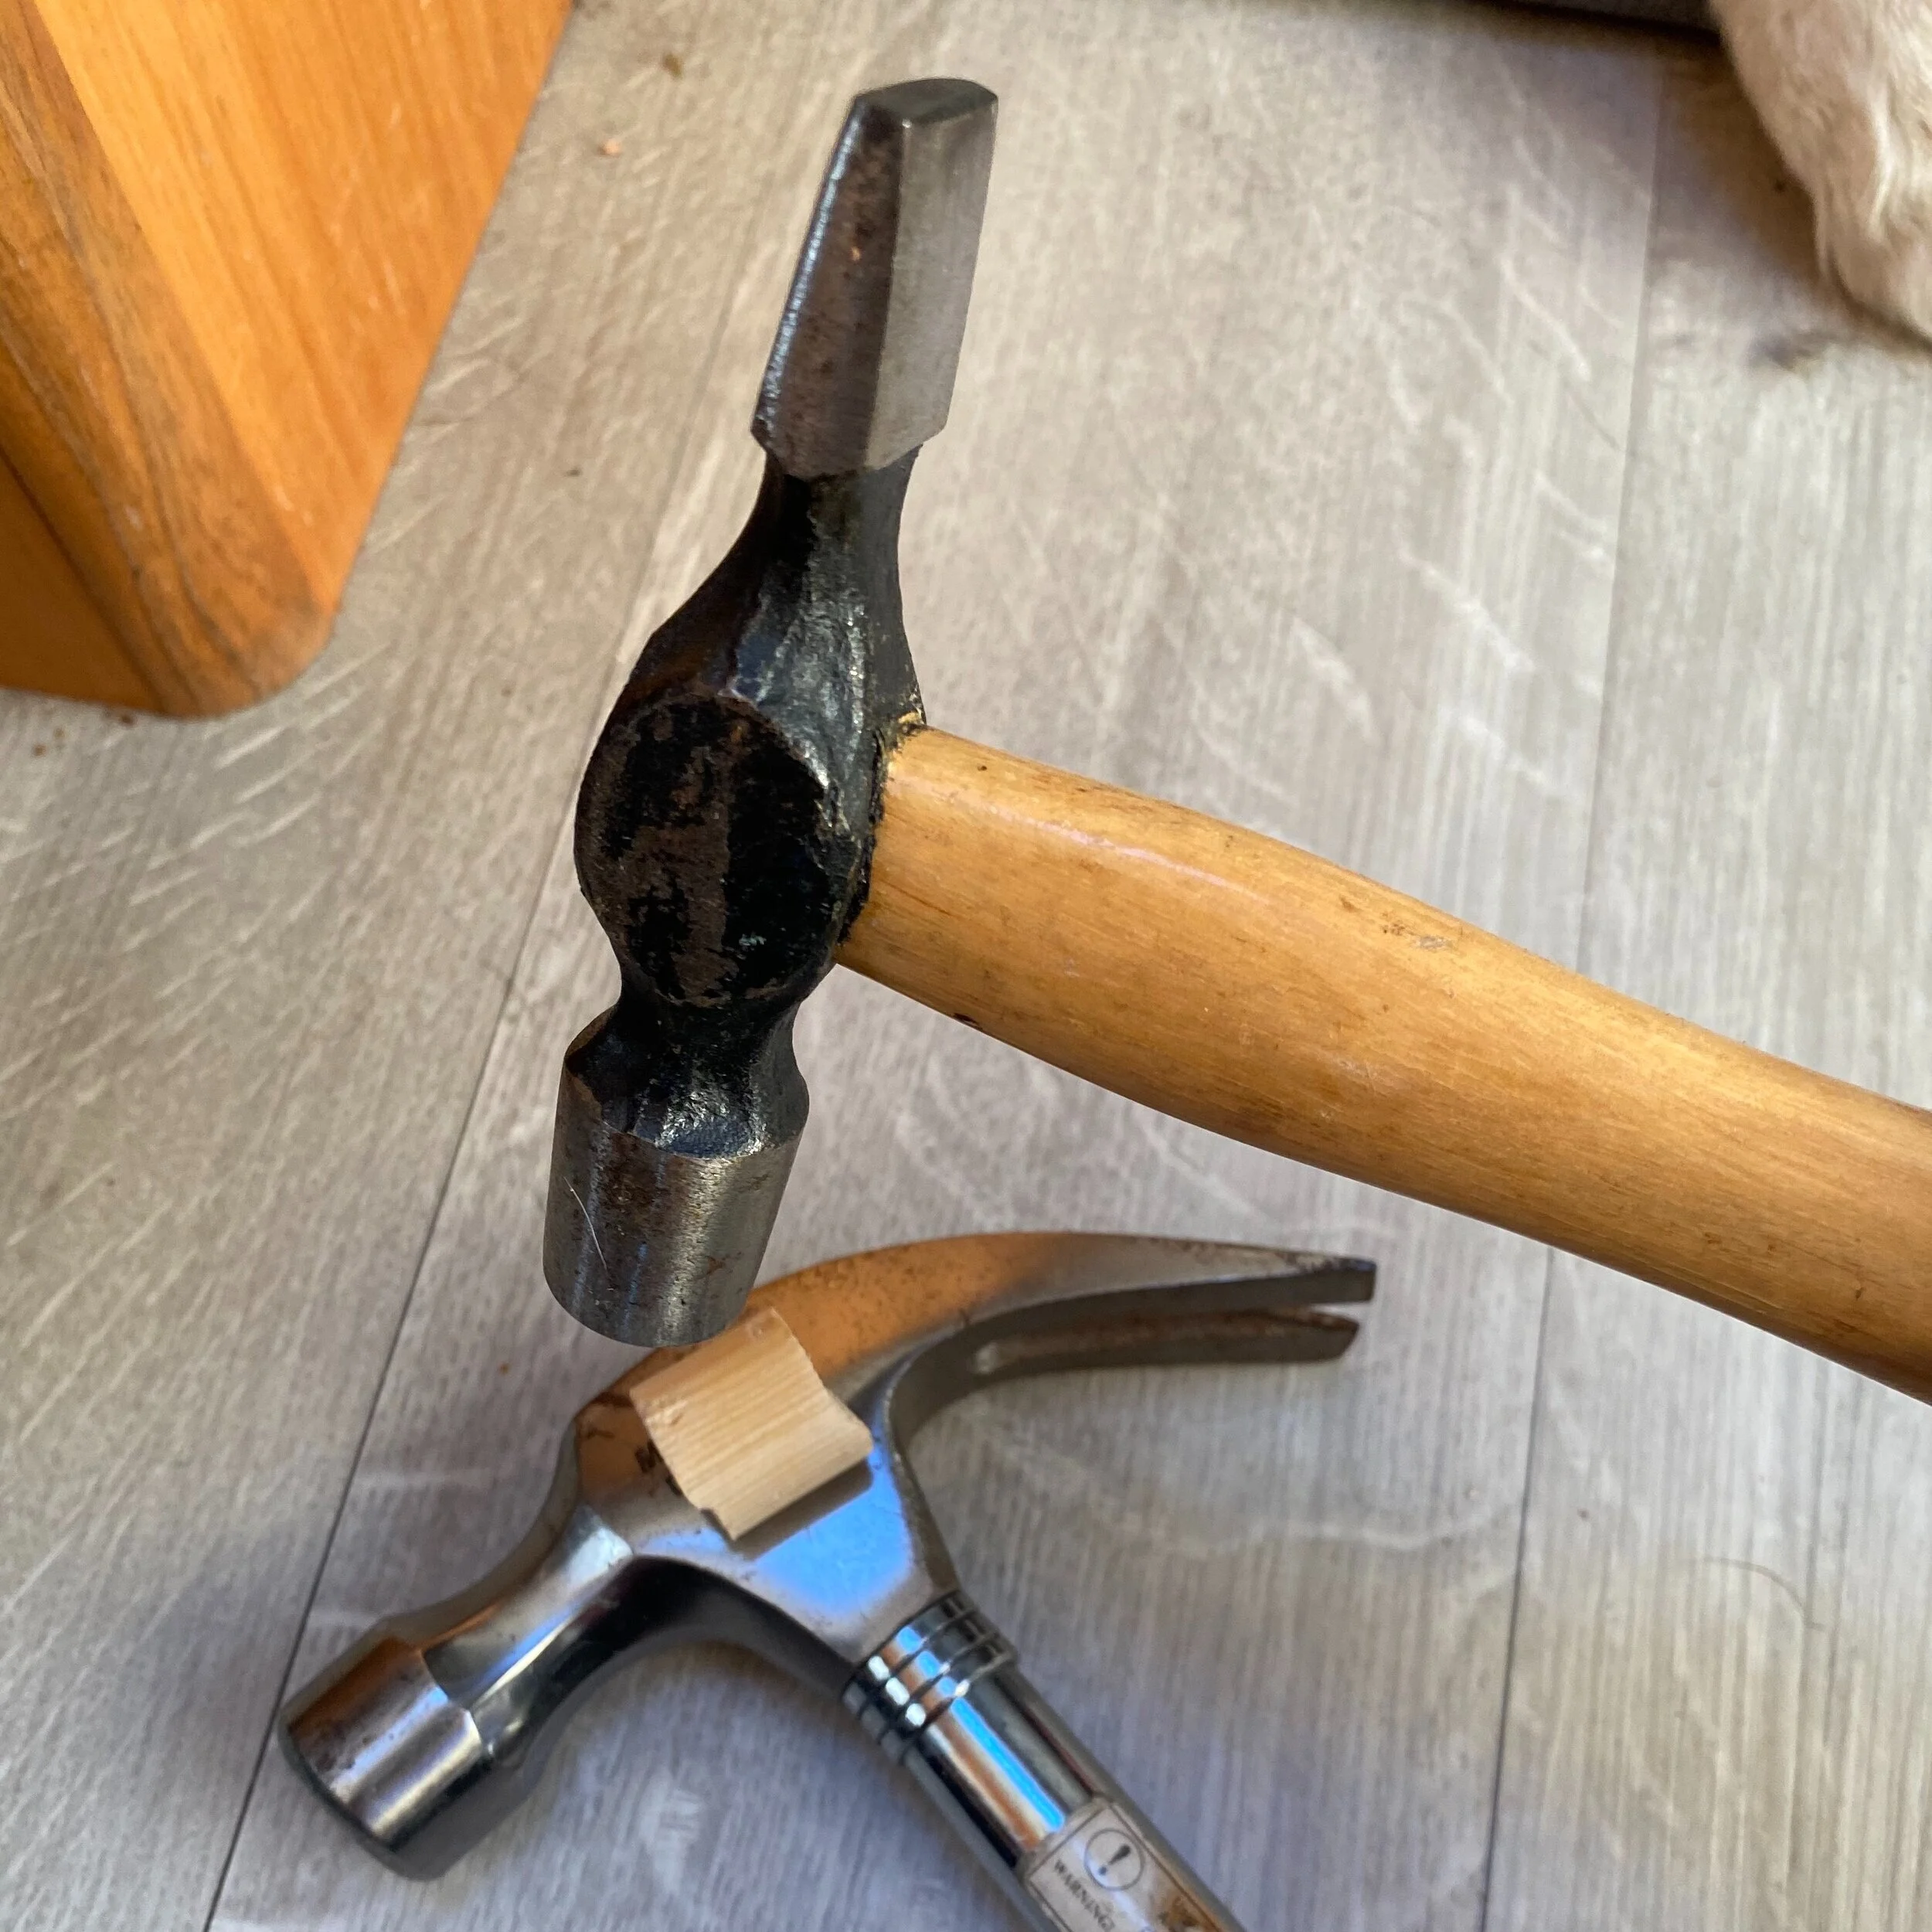
Step 3: Hammer to size—avoid your fingers
Because I'd estimated the diameter of the hole—you always forget something before getting to the hardware store—the dowel rod was just a smidge too fat to fit. So Chris suggested hammering them down in size. Genius! This also helped ensure it was a snug fit that would hold up to daily use.
To do this, I set each of the dowel rod pieces on top of another hammer, holding them in place, I just hammered at them to compress the wood. Any hard, not-easily-dentable surface will do—you're meant to avoid hitting it anyway. Give it a good couple thwacks, then rotate it slightly and continuing hammering until you've made it the whole 360 degrees around the dowel.
Magically, I avoided my thumbs. Mostly.
Step 4: Hammer them into place
Then, my favorite part! Using just your hands, gently force them into the fillers into the hole left by the previous knobs. Just enough that they stay put on their own. Keeping it as flush and evenly inserted as possible.
I suggest hammering from the exterior of the cupboard (what you see) toward the inside of the cupboard in case you have any splintering from forcing it in, it'll be hidden on the inside.
You want it to be a snug fit, so the force of opening and closing the door doesn't pull the dowel rod out. I chose to screw through this same area to add my new knobs, but to be totally sure, you could reattach your new hardware slightly above or below the old holes.
Step 5: Spackle over to create smooth surface
To get a smooth finish when you paint them, I decided to spackle over the raw wood. I used an fast drying option I already had on hand, but for RV or van use, a flexible option might be best.
Step 6: Sand off excess spackle and then paint
I applied the spackle generously, so I sanded it down for a smooth finish. I then, primed and painted it with a fresh new color. I went with kitchen-specific paint to help it hold up to water and food grime.
Step 7: Pre-drill hole for new handle hardware
It's finally time to get your beautiful, new handles up! The screws that came with the handles were flat-tipped and therefore wouldn't drill through the wood. They're meant to screw into the back of the handle. So you'll need to pre-drill a hole that guides the screw through the wood. Nothing in a caravan is perfectly straight, so use your best judgment about the angle you drill into the wood. You want to make sure the back of the handle will sit flush against the door. You don't wanna end up with a crooked knob (hahaha ok ok I had to).

Bonus tip: Check your screw length
Renovating in a foreign country poses lots of challenges, like unfamiliar brands for supplies and expertise or recommendations that get lost in translation. The hardware store didn't ask what length screw I needed so they provided a universal one you can clip down to the size you need. Thing is...we didn't have metal clippers. So we had to handsaw every 👏 single 👏 screw 👏. I suggest measuring the depth of the door and providing that information to your hardware store so they can provide the right length screw upfront.
Step 8: Screw in new handles & voila, done!
Before

After

We picked a name for our tiny house on wheels! Meet our DIY RV, Ida Lewis.
Like any proud parents, we had lots of prerequisites to choosing a name for our van. But, we’ve finally decided to name our DIY van build after the badass American icon, Ida Lewis.

Guys, after much deliberation, we finally named our girl! To be clear, I mean we chose a name for our RV hehe. We decided to name our DIY van build after the badass American icon, Ida Lewis. But let me back up for a second, because if you’ve been around for a while, you may have thought we’d already had a name going into RV life.
Chris and I moved in together after only 3 months! I know, I know. But the short of it is: when you know, you know. It didn’t take long for me to nickname our first flat together in Barcelona. Every month, I’d have a good giggle picturing the bank folks cringing when they caught a glimpse of my rent transfer to Chris—always lovingly signed “for the Love Nest.” Nest is translated as “nido” in Spanish. And when we started our tiny house journey, we started referring to it as our Casita Nido. Or “little house nest”, if you will. We even reserved the URL and Instagram handle.
Maybe when we build our bricks and sticks home perched high up in the Catalan mountains, or on a seaside cliff on the Costa Brava, we’ll go back to that name. But we both agreed it didn’t fit our new tiny house on wheels, so we got to brainstorming.

Like any proud parents, we had lots of prerequisites to choosing a name for our van. We wanted it to:
pay homage to our American, Cuban, and Scottish heritage
be sensitive to our adoptive home of Spain and its native language
reflect all the adventures we’d embark on and experience on the road in our RV
embody the values we feel strongly about as a family, like feminism, alternative living, tenacity, being close to nature, adventure, and plain ol’ badassery
So with a little creative license, we adjusted the pronunciation a bit. The original Ida was pronounced /eye-duh/, but we changed it up to sound a bit more Spanish. We refer to our RV as Ida Lewis
, /ee-duh loo-es/. Which is also a play on words. Ida means “going” or “to go” in Spanish—appropriate when you consider our house and life are literally on wheels now.
Ida was an American woman, but her surname, surliness, and penchant for braving the freezing sea felt very Scottish. (Plus she has a connection with millionaire and Scottish immigrant Andrew Carnegie, but more on that later.) Despite her small stature, this woman saved countless men—including numerous naval seamen—from drowning in the sea in a FULL👏 BLOWN👏 BUSTLE!👏 And frankly, I think that sums up the, read: MOOD, we wanted for this next chapter of our lives.
I first heard Ida’s story on the Stuff You Missed In History podcast. I remember enthusiastically recounting every detail of her unique life to Chris when he got home. Who, I should mention, was the one who later had the brilliant idea to honor her as our namesake. But if you’re unfamiliar with her story, I wanted to share a Sparknotes version here.
Ida Lewis was deemed “the Bravest Woman in America” by the press. She was born in Newport in the 1800s. As a preteen, her father was appointed lighthouse keeper of Lime Rock Light just off the coast of Rhode Island. Unfortunately, shortly after moving to the remote island, he had a debilitating stroke. This, and what I can only assume was an innate toughness, required Ida to step up to run the lighthouse and care for her younger siblings alongside her mother.
If you’re like me and hadn’t really given this kind of lifestyle much thought before, let me paint the picture for you. It required her to stay up all night tending to the lighthouse, including filling the lamp with oil from dusk to dawn, trimming the wick, and polishing the reflective bits, so sailors could see clearly. Then after a long night’s work and despite the area being prone to poor weather, she’d brave the sea every day to row her siblings to school. Returning for a quick nap before doing chores and picking them back up, and then it all over again the next day.
If that wasn’t enough badassery for a special honor, Ida is credited with saving 18 lives! Some accounts even say as many as 25 in her lifetime. Here’s the most famous story borrowed from Wikipedia:

“Her most famous rescue occurred on March 29, 1869. Two soldiers, Sgt. James Adams and Pvt. John McLaughlin, were passing through Newport Harbor toward Fort Adams in a small boat, guided by a 14-year-old boy who claimed to know his way through the harbor. A snowstorm was churning the harbor's waters, and the boat overturned. The two soldiers clung to it while the boy was lost, dying in the icy water. Lewis's mother saw the two in the water and called to Ida, who was suffering from a cold. Ida ran to her boat without taking the time to put on a coat or shoes. With the help of her younger brother, she was able to haul the two men into her boat and bring them to the lighthouse.”
Ida loved living in solitude on the island and humbly considered these daring and lifesaving acts, simply, as her duty. However, they garnered her a ton of adoration from the public
She has had music written about her.
She was one of the first women to be recognized as an official lighthouse keeper.
She received a pension (unheard of for female keepers) from previously mentioned Andrew Carnegie.
And the island the lighthouse was on was renamed after her—“the only such honor ever paid to a keeper in the United States.”
But, one of my favorite tidbits about her is this quote where she responds to criticism about it being un-ladylike for women to row boats. Ida said, "None, but a donkey would consider it 'un-feminine' to save lives." That my friends is Ida Lewis. Our RV’s namesake. 👏